The strength of a wildlife photo does not lie in the sharpness of the subject, but in the clarity of the story it suggests.
- The shift to narrative photography requires considering the habitat not as a background, but as a character in its own right.
- Each technical choice (framing, light, speed) must be a word in your “visual grammar,” serving a specific intention.
Recommendation: Before even picking up your camera, define the “invisible scenario” of your image: the emotion or idea you want to convey.
You return from a trip to the forests of Quebec with a memory card full of impeccable images: a deer’s eye is in perfect focus, a blue jay’s plumage is exposed to perfection. Yet, as you look at them, a frustration lingers. Your photos are technically successful, but they feel “flat.” They describe, but they do not tell a story. They show, but they do not move. You have mastered your camera, but not yet the art of visual storytelling. This is a common feeling among many passionate amateur photographers who feel they are missing a key to reaching the next level.
The usual response is to stack technical advice: use a wide aperture for a beautiful background blur, apply the rule of thirds, shoot during the golden hour. While these rules are the foundations of photographic grammar, they are not enough to write a poem. The obsession with technical perfection often leads to sterile images—decontextualized animal portraits that could have been taken anywhere. What if the real key wasn’t a new setting or a more expensive lens, but a radically different approach? What if the secret was to think like an art director before thinking like a technician?
This article proposes moving away from simple capture to embrace construction. We will explore how to transform every element of your composition into a word, every choice of light into a sentence, and every image into a chapter of a story. The goal is no longer to photograph an animal, but to tell the story of that animal in its world. From field ethics to file management, we will see how every step of the process can and must serve a narrative intention, transforming your descriptive shots into works that resonate and leave a lasting impression.
To guide you through this transformation of your gaze, we have structured this article as a narrative progression. We will begin with the ethical and compositional foundations before diving into technical choices and strategies to bring your visual stories to life and give them value.
Summary: From Capture to Narrative in Wildlife Photography
- How to succeed in wildlife photography in Quebec without disturbing the fauna?
- The framing error that makes your bear photos banal and lack impact
- Wide shot: Why including the habitat in the image is often stronger than a tight close-up?
- Shutter speed: What settings to freeze a bird in flight without motion blur?
- Dawn or dusk: Which moment offers the most dramatic light on flocks?
- Lightroom: How to reveal plumage details without creating an artificial look?
- Hard drives and backups: How to manage 2,000 RAW photos a day on an expedition?
- Image banks or fine art prints: Which business model to monetize your passion?
How to succeed in wildlife photography in Quebec without disturbing the fauna?
Before even thinking about composition or light, the first stone of any narrative wildlife photography is ethics. An image that tells a true story is an image that captures authentic behavior, unaltered by the photographer’s presence. In Quebec, with its vast territories and iconic wildlife, this responsibility is paramount. The ethical approach is not a constraint, but the foundation of your narrative. It ensures that the story you are telling is the animal’s story, not its reaction to your intrusion. A photo taken in absolute respect for the animal’s peace possesses a power and sincerity that no technical prowess can ever match.
This philosophy of respect is at the heart of innovative projects seeking to reinvent the genre. As Julien Donzé and Fabien Wohlschlag point out regarding their approach:
The web-series Animalis is dedicated to animal observation in our regions, respecting the environment and fauna. The concept is innovative: it dusts off the wildlife documentary genre.
– Julien Donzé (Le Grand JD) and Fabien Wohlschlag, Phototrend – Animalis Web-series
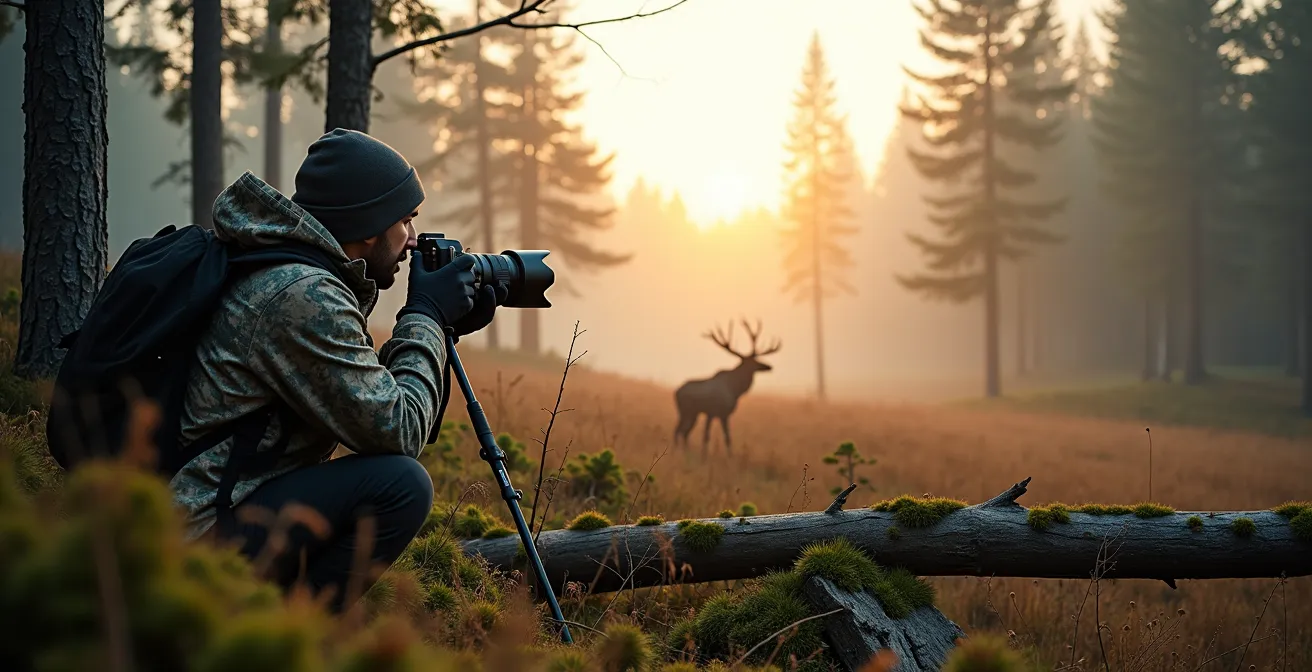
Thinking in terms of narrative also means making patience and distance your main tools. Rather than trying to get close at all costs, use long focal lengths and learn to blend into the scenery. It is in the waiting, from a blind or a hide, that the most powerful scenes unfold: an interaction between two individuals, a moment of hunting, an instant of rest. These authentic moments of life are the raw material for the most captivating stories.
Action Plan: Your Ethical Protocol on the Quebec Terrain
- Respect distances: Scrupulously follow the minimum distances imposed by organizations like Sépaq and Parks Canada (a minimum of 30 meters for large mammals like moose or black bears, and often 100 meters for more sensitive species).
- Equipment choice: Invest in or rent telephoto lenses of 600mm and beyond. They are not just for close-ups, but for maintaining a distance that ensures the animal’s safety and yours, while capturing natural behaviors.
- Narrative composition of the wait: Integrate the empty environment into your frame to tell the story of patience, the immensity of the territory, and the discretion of your approach. A photo showing the track without the animal can create powerful narrative tension.
- Documenting the approach: Integrate your ethical process into your story. A photo of your camouflaged blind, taken with another camera, can become the introduction to your photo series, explaining how you obtained your images.
- Making distance a style: Transform the constraint of distance into a visual signature. Value images where the animal interacts with its environment rather than simple portraits, proving that your presence had zero impact.
The framing error that makes your bear photos banal and lack impact
The most common mistake when photographing a large mammal like the black bear is to approach it like a tourist: a framing at eye level, centered, which simply says “I saw a bear.” This approach produces a descriptive image, but one that is flat and emotionless. It puts the viewer and the animal on equal footing, trivializing the power and status of this iconic animal of the Quebec forests. To tell a story, you must abandon this neutral point of view and choose an angle that serves an intention. Do you want to evoke its quiet strength, its imposing stature, or conversely, its vulnerability?
Framing then becomes a psychological tool. Instead of simply documenting its presence, you sculpt the viewer’s perception. A change in angle of just a few inches can radically transform the narrative. The choice of what you include or exclude from the frame is the first act of your storytelling. This is where you decide if your main character is a colossus or a simple forest dweller.
Case Study: The Narrative Approach to Bear Framing
Artistic wildlife photographers are increasingly moving away from the classic portrait. To convey an idea of power and respect, they adopt low-angle shots, placing themselves almost at ground level. This point of view instantly gives the bear a dominant stature, magnifying it and emphasizing its place at the top of the food chain. Conversely, to create narrative tension and tell the story of the predator’s invisible presence, another approach is to focus on its tracks: claw marks on a trunk or footprints in the mud become the main subject. The bear is absent from the image, but its story is everywhere, stimulating the viewer’s imagination far more effectively than a simple portrait.
Moving beyond the ease of eye-level framing is therefore imperative. Think in terms of the power relationship between the subject and the viewer. A low angle aggrandizes the subject, while a high angle diminishes it. Tight framing on a detail (a claw, an eye) creates intimacy or apprehension. Every choice must be conscious and serve the “invisible scenario” you have in mind for your character.
Wide shot: Why including the habitat in the image is often stronger than a tight close-up?
The obsession with the close-up is another legacy of purely descriptive photography. We want to see every hair, every detail of the feather. While the technical feat is satisfying, it often disconnects the animal from its soul: its environment. A caribou is not just a deer with majestic antlers; it is a creature sculpted by the tundra, a symbol of survival in the immensity. Photographing it in a very tight shot tells only a tiny part of its story. On the other hand, presenting it as a small silhouette in a grandiose landscape evokes solitude, the harshness of the climate, and the fragility of life against the power of nature. The habitat is no longer a background; it becomes a character in its own right in your story.
This approach, often called “animal in landscape,” transforms the scale of your narrative. The story is no longer “here is an animal,” but “here is the life of an animal in this world.” It is a powerful paradigm shift, particularly relevant in the spectacular landscapes of Canada, from Nunavik to Banff National Park.
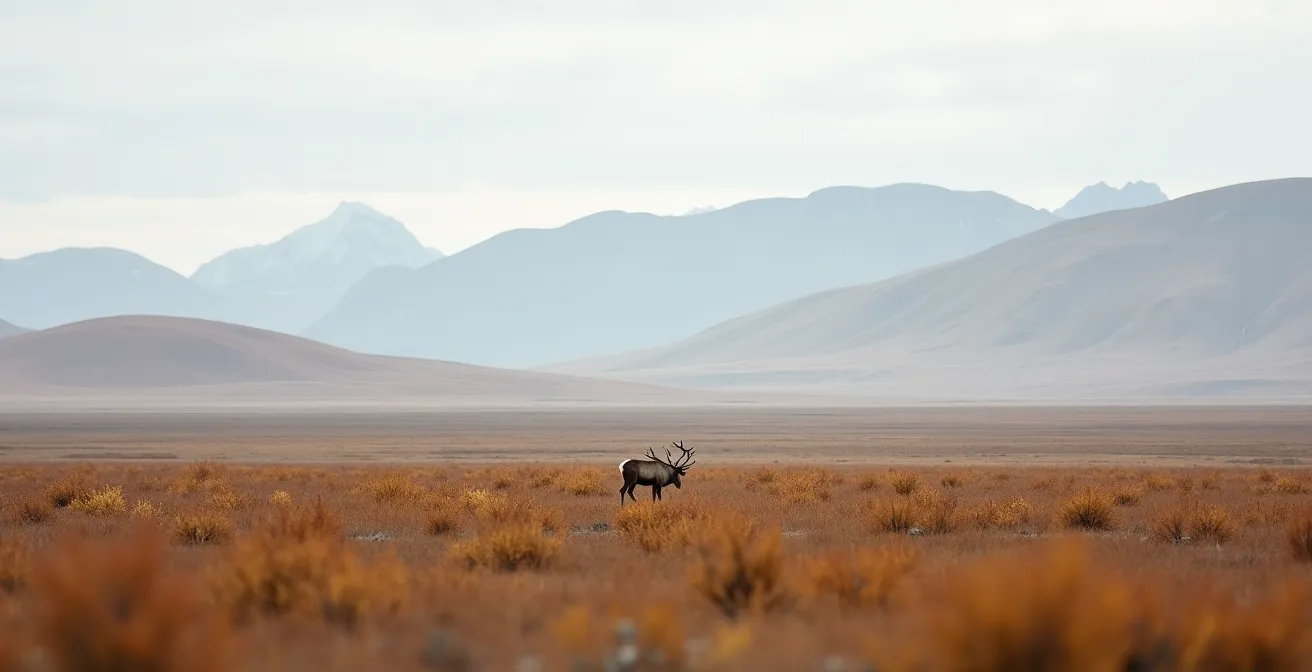
As seen in this image, the small size of the caribou relative to the vastness of the Nunavik tundra does not diminish its importance; on the contrary. It amplifies the story of its resilience. The viewer does not just identify the species; they feel the scale of its territory and the magnitude of its journey. The relationship between the subject and its environment becomes the heart of the story.
Integrating the environment requires mastering landscape composition: using leading lines, playing with layers (foreground, middle ground, background), and closing the aperture (e.g., f/8 to f/11) to achieve a greater depth of field. Your wildlife subject then becomes the element that anchors the gaze and gives meaning and scale to the entire landscape.
Shutter speed: What settings to freeze a bird in flight without motion blur?
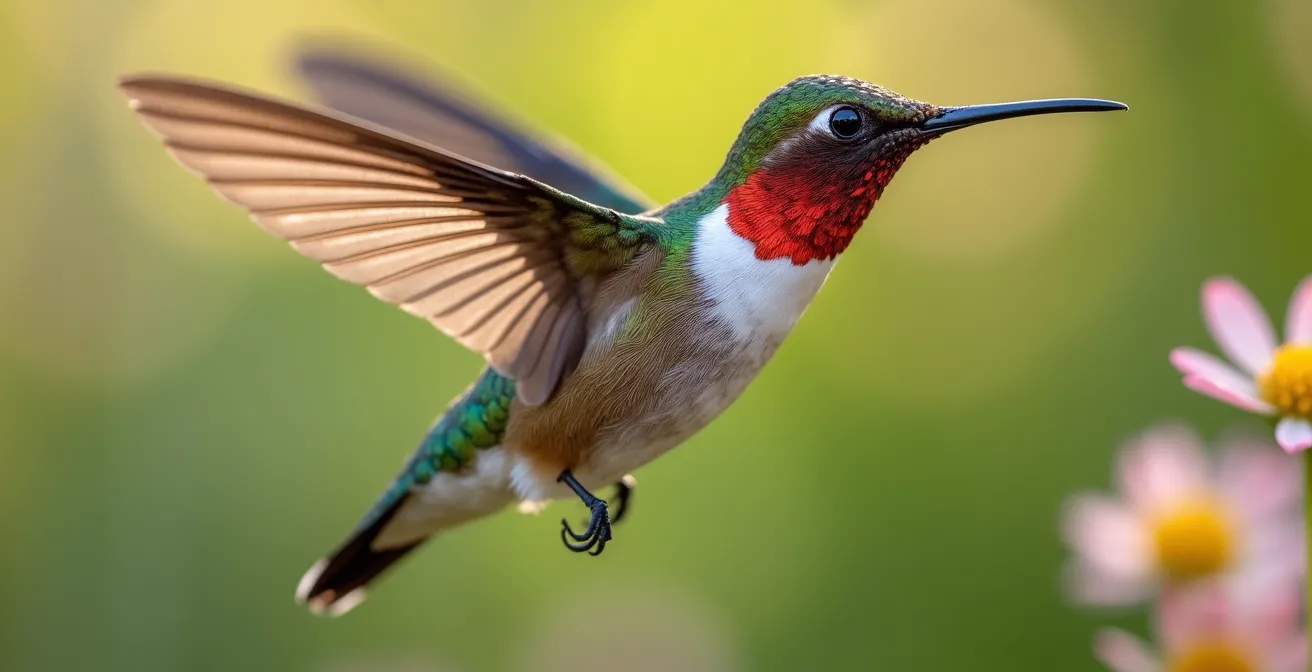
The question of shutter speed is often approached from a purely technical angle: freezing movement to obtain perfect sharpness. But in a narrative approach, speed becomes a rhetorical tool. Completely freezing the action is not always the best way to tell a story. The choice of speed should stem from the emotion or idea you wish to convey. Do you want to describe the frenetic energy of a hummingbird, the power of a diving osprey, or the fluid grace of a flock of Canada geese in migration? Every story calls for a different speed.
An extremely fast shutter speed (1/4000s and beyond) captures details invisible to the naked eye. It serves a narrative of scientific precision and mechanical perfection. It is ideal for showing the complex structure of a wing in mid-beat or the water droplet pearling off the tip of a beak. This absolute sharpness tells the story of biology, efficiency, and the decisive moment frozen for eternity.
Conversely, a slower speed (e.g., 1/60s to 1/500s) can introduce intentional motion blur. A slight blur on the wingtips of a bird in flight, while its head remains sharp, conveys a sense of speed and effort that a perfectly frozen image cannot express. The “panning” technique, where you follow the subject with your camera, keeps the subject sharp while creating dynamic streaks in the background. This tells the story of the race, the pursuit, the violence of the action. Speed is therefore no longer just a setting, but a narrative slider.
- 1/4000s to 1/8000s: To perfectly freeze a hummingbird’s wings and tell the story of its energetic frenzy.
- 1/2000s to 1/3000s: Ideal for a diving osprey, for surgical sharpness of the decisive moment.
- 1/500s to 1/1000s: Perfect for geese in flight with slight wing blur, to suggest migratory effort.
- 1/60s to 1/125s: Essential for the panning technique, to convey the violence and speed of racing action.
- 1/32000s (electronic shutter): To capture the invisible, like water droplets sprayed from a diving loon’s beak, and tell a story of hidden details.
Dawn or dusk: Which moment offers the most dramatic light on flocks?
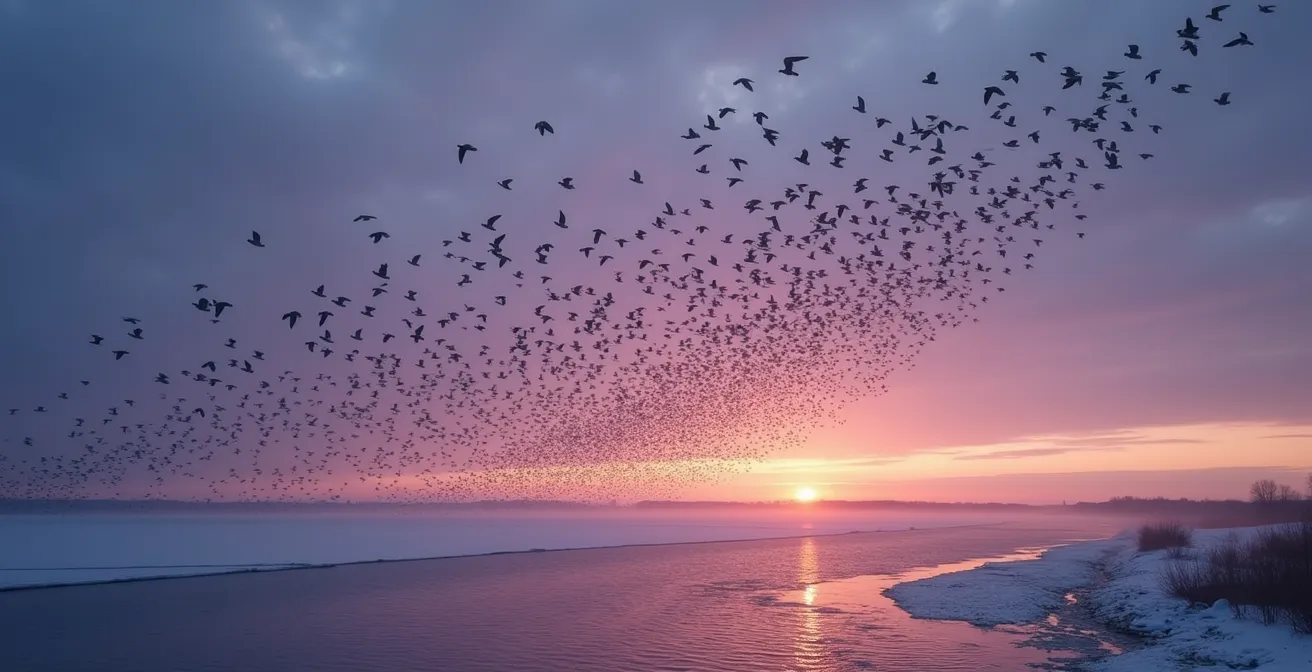
Light is the photographer’s brush, and the golden hours (dawn and dusk) are their richest palette. However, choosing between morning and evening is not just a matter of preference. It is a crucial narrative choice that will define the “emotional signature” of your image. The warm, ascending light of dawn does not tell the same story as the cool, descending light of dusk. In Quebec, photographing a flock of snow geese at the Beaudet reservoir in Victoriaville can yield two completely opposite narratives depending on the time chosen.
Dawn, with its golden and orange hues, is often associated with hope, renewal, and the energy of departure. A flock of birds taking off in this light evokes the beginning of a great journey, optimism in the face of the day ahead. The light is dynamic, full of promise. Dusk, and particularly the “blue hour” following sunset, bathes the scene in cool, blue, and violet tones. This light is more introspective, evoking melancholy, the end of a cycle, and the mystery of the approaching night. A flock of birds in this atmosphere tells of return, the day’s fatigue, or solitude in the face of the vast night sky.
Color is therefore not just an aesthetic varnish; it is the primary vector of emotion. The narrative photographer’s eye knows that the warm morning light on snow geese can suggest the hope of the migratory journey, while the cool twilight light on the same birds evokes the melancholy of departure or the quietude of rest. These nuances allow for the creation of distinct visual narrations, even with the same subject in the same place. The choice of light becomes the choice of the dominant emotion of your story.
The treatment of silhouettes is particularly powerful during these hours. By exposing for the sky, you transform animals into graphic black shapes. It is no longer the detail of the individual that matters, but the symbol of the collective, the movement of the group, the pattern it draws in the sky. This is a powerful approach for telling stories of migration, gregarious instinct, and scale.
Lightroom: How to reveal plumage details without creating an artificial look?
Post-processing is the final chapter of your narrative process. This is where you refine your “emotional signature.” The classic mistake is to push sliders (clarity, texture, saturation) to the maximum to “make details pop,” resulting in a hyper-realistic, artificial look devoid of subtlety. Snowy owl plumage should not look like textured plastic. Narrative editing aims for the opposite: the sublimation of the natural. Every adjustment must serve the story and the atmosphere, not just technical performance. How do you reveal the delicacy of white plumage without blowing it out, while maintaining the cold atmosphere of a snowy landscape?
The key lies in localized editing. Instead of applying a setting to the entire image, masks are used to work precisely on specific areas. This is the work of a digital painter, where one chooses to draw the eye to a detail and leave another area in softness. For example, a subtle increase in clarity on a fox’s eye will make it look sharper, while a negative texture applied to the rest of its coat will soften the fur. It is this subtle play of contrasts that brings life and realism to the image.
This approach, far from being innate, can be learned and can radically transform the quality of your images. Amateur photographers, starting with little knowledge, can make giant leaps in a few weeks. By focusing on masking techniques and developing a personal style, it is possible to acquire mastery that serves the artistic vision. The evolution of many Quebec students in wildlife retouching demonstrates that acquiring these technical narrative skills is within reach of all enthusiasts.
To sublimate a bird’s plumage, for example, the process is surgical:
- Step 1: Precise Isolation: Use luminance masks to very precisely isolate areas of white feathers without affecting the background, even if it is also white like snow.
- Step 2: Softness and Delicacy: Apply a negative texture (-20 to -30) on the plumage to soften micro-details while preserving the natural and delicate structure of the feathers.
- Step 3: Chromatic Atmosphere: Create seasonal-specific presets with the Color Grading tool. A slight blue tint in the shadows will reinforce the wintry atmosphere, while a touch of gold in the highlights will evoke a summer evening.
- Step 4: Localized Clarity: Only use the Clarity slider locally (with a radial mask or brush) on the eye or beak to give them impact, and avoid applying it globally to prevent an artificial HDR effect.
- Step 5: Subtle Layered Rendering: Combine several masks (luminance, color, brush) with different opacities for a complex and subtle rendering, mimicking how light naturally interacts with different layers of feathers.
Hard drives and backups: How to manage 2,000 RAW photos a day on an expedition?
A photo expedition in remote regions of Quebec can generate a colossal amount of data. Managing 2,000 RAW photos a day is not just a technical challenge; it is also a narrative one. Losing a day’s files means losing an entire chapter of your story. Backup management must therefore be as rigorous as your field approach. But beyond simple security, the organization of your files can itself become part of the creative process, helping you build your narrative as you go.
The standard approach is to classify files by date. This is functional but uninspiring. The narrative approach, however, invites you to think in terms of scenes and sequences. Instead of a folder named “2024-08-15,” create a folder named “Day 3 – Waiting by the Lake.” This simple action reframes your thinking: you are no longer sorting files; you are assembling pieces of a narrative puzzle. This daily sorting process on an expedition becomes an initial edit, a first draft of your story.
On the hardware side, choosing the right storage solution in remote areas is crucial. You must balance capacity, robustness, autonomy, and cost. A standalone backup station, though expensive, allows you to offload memory cards and check images without needing a computer—a major asset in the wild. A rugged SSD offers an excellent compromise between speed and resistance to shock and water.
This comparative table summarizes options for an expedition in a remote environment. As shown in an analysis of storage solutions for nomadic photographers, there is no single solution, but rather a trade-off based on the duration and conditions of your project.
| Solution | Capacity | Durability | Autonomy | Average Price |
|---|---|---|---|---|
| Rugged SSD 2TB | 2000 GB | Shockproof, IP67 waterproof | USB Powered | 350-450€ |
| Portable HDD 5TB | 5000 GB | Basic shock resistance | USB Powered | 150-200€ |
| Standalone backup station | 1-2 TB built-in | Military-grade ruggedness | 5-7h battery life | 800-1200€ |
The safest method remains redundancy: having at least two copies of your files on two different media every night. Beyond security, think about the narrative organization of your files right from the field. Use the star rating systems and keywords in your camera or on a tablet software to identify the narrative potential of each image. A photo rated 5 stars is not just “technically good”; it is a “key moment in the story.” Adding keywords like “tension,” “tenderness,” or “solitude” will save you valuable time and guide your post-production.
Key Takeaways
- Think of your story before your technique: the “invisible scenario” dictates your choices of composition, light, and settings.
- Consider the habitat and light as characters in their own right in your story, providing context and emotion to your subject.
- Ethics, patience, and respect for distance are not constraints, but the foundations of an authentic and powerful narrative.
Image banks or fine art prints: Which business model to monetize your passion?
Once you have developed a narrative approach and a strong visual signature, the question of valuing your work arises. Two main paths are available to the wildlife photographer: image banks (microstock or macrostock) and the sale of fine art prints. The first path plays on volume and meets descriptive and commercial needs. The second plays on rarity and targets a public of collectors and art lovers. Your narrative approach positions you ideally for the second option.
Image banks look for clean, descriptive photos, often on a neutral background. This is the antithesis of the “animal in landscape” approach that tells a story. Selling your narrative images at low prices on these platforms would devalue all the construction work you have accomplished. Profitability there is low, and massive production is required to hope for significant income. According to European data, a freelance wildlife photographer can expect to earn between €1,660 and €2,920 gross per month, but this often involves combining this activity with other photographic missions.
The fine art print path is far more consistent with an authorial approach. Each image becomes a limited edition work, signed, accompanied by a certificate of authenticity, and, most importantly, its story. The text that accompanies your image (the “artist statement” or “caption”) is not a simple description; it tells the context, the intention, and the emotion. It is this narrative that creates the link with the buyer and gives the work its full value.
Case Study: The Success of Vladimir Medvedev’s Artistic Model
Photographer Vladimir Medvedev, award-winning for his shots of Banff National Park in Canada, built his success on a conscious refusal of popular sites and conventional images. As he explains in an interview for Canon, he found his niche in creative naturalistic photography, at the intersection of art and environmentalism. His business model relies on the sale of fine art prints that do not just show an animal but explore the relationship between wildlife and its habitat with a unique artistic touch. This positioning allows him to sell his works at prices far higher than those of image banks, reaching an audience looking for a vision and a story, not just an illustration.
Adopting a model based on fine art prints requires developing complementary skills: personal marketing, creating a portfolio website, participating in exhibitions, and mastering the printing chain to guarantee impeccable quality. It is a larger investment, but one that respects and values your authorial approach.
The transition from descriptive photography to narrative photography is a journey that transforms not only your images but also your perspective on nature. By developing your own visual signature and your ability to tell stories, you no longer create simple snapshots, but open windows onto wild worlds. To add value to this unique vision, the logical step is to build your own platform and offer your works as fine art prints.